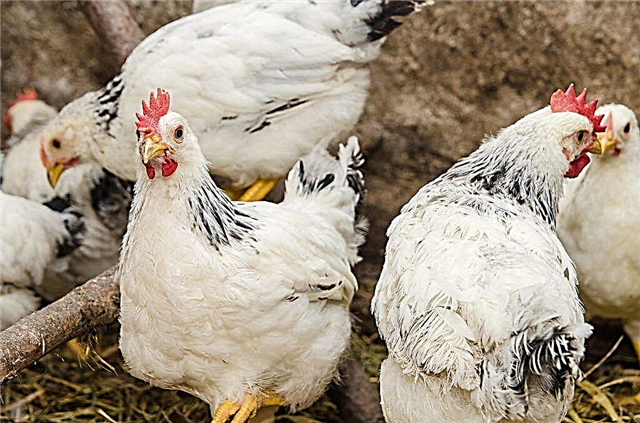
When breeding chickens, it is necessary to think in advance where they will be kept from the first days of life. For these purposes, breeders often use brooders - special devices in which all the conditions necessary for the growth and development of chicks are created. They can be easily made in a home workshop using ready-made instructions.

Requirements
A brooder actually helps replace chickens with a brood hen by being a small box in which they are kept in the first weeks of their life if bred under artificial conditions. When making it homemade, attention should be paid to the following parameters:
- Dimensions... Depends on the number of chickens, since 1 sq. m should not come more than 25 individuals. Taking into account that they will be kept in a brooder until 2 or 3 months of age, at least 0.1 square meters should be allocated for one individual. m area. A standard "house" can often contain 50 one-day chicks. Its acceptable dimensions are as follows:
- length - 100 cm;
- height - 50 cm;
- width - 50 cm.
Thus, the dimensions of a standard box for living 50 chicks are 100x50x50 cm.If you plan to keep broilers or more than 60 chickens, you can increase the width and length to 60 cm and 1 m, respectively, at a height of 50 cm
- Ventilation... The brooder should be well ventilated, but drafts should not be allowed as chicks are extremely sensitive to cold.
- Humidity... An excessive increase in humidity must not be allowed in the box, as this can weaken the protective properties of the young animal's body. Only on the first day it can be maintained at the level of 60-70%.
- Floor... Must be dry and non-slip or chicks may get sick or hurt.
- The presence of a pallet for collecting manure... If possible, a special tray should be organized under the floor for collecting excrement. It will greatly facilitate keeping the brooder clean. The fact is that the droppings must be cleaned regularly, but at the same time, you should not constantly disturb the chickens, especially those who have not yet turned 50 days old. A special pallet will help solve this problem.
- Heating... A moderate heating source must be installed inside the brooder to maintain proper temperature. In the first days of chicks life it should be about 35 ° C, but after that it can be lowered to 30 ° C. In this case, the heating source must be installed in such a way that the inhabitants of the "house" could not get to it.
Given these parameters, a home master can assemble a brooder using the following scheme:

If necessary, you can make several similar boxes and stack them on top of each other to get a battery where you can raise a large number of chicks.
The key nuances and parameters that a home craftsman should consider when making a brooder are given in the following video:
Selection of materials and tools
In order for the product to have improved performance characteristics and serve for more than one season, it is extremely important to choose the right materials for its assembly. Here are the acceptable options:
- Oriented strand board (OSB sheet, OSB)... Used as a base for construction. The optimum slab thickness is 9 mm. It should be noted that it should not be used as the main material, since it has an uneven surface and is difficult to wash.
- Plywood... It is considered a good option for making frames and doors, as it is a smooth material that can be easily cleaned and disinfected. However, plywood is quite fragile, so it can break under the weight. So, if you plan to make a battery, you should use sheets with great strength, although their cost will be much higher.
- Wooden slats, beams... Suitable as raw materials for assembling the frame and door. In addition, they can be used to create a slatted floor.
In order for the structure to be reliable, the frame frame should be made of wooden boards and bars, and OSB boards or plywood sheets should be fixed on it. These materials heat up well, so they help keep the drawer dry and warm.
- Cross-cut mesh... It is needed to cover the viewing windows in the doors. At the same time, the mesh lets in sunlight, which is also beneficial for chickens.
- Galvanized metal mesh... A pallet is made from it for collecting droppings. To do this, you need to use a piece measuring 1.0x0.5 cm. Such a mesh should have small cells (about 1 cm).
- Incandescent lamp... Installed inside the brooder as a source of light and heating.
- Self-tapping screws... They should be used when assembling a product, which in the future can be completely disassembled if necessary.
Some craftsmen mistakenly use polymeric materials like polycarbonate. They are easy to clean and disinfect, but they practically do not breathe, therefore they do not allow maintaining the optimal temperature and humidity regime inside the structure.
The complete set of necessary tools looks like this:
- a hacksaw or an electric tool for sawing wood;
- an electric jigsaw or saw for woodworking;
- drill and screwdriver for quick assembly of the structure;
- scissors for metal for cutting perforated mesh or sheet metal;
- hammer, nippers, pliers;
- tape measure, pencil.
Assembly instructions
After calculating the dimensions and preparing the drawings, you can start assembling the structure, which is a box with doors, a mesh bottom and a litter collection tray. We will consider efficient assembly methods further.
Method number 1
To make a "house" for young animals, you need to have the following materials at hand:
- 2 sheet plywood with dimensions of 1.5x1.5 m;
- metal corners;
- steel mesh with cells 10x10 mm;
- wooden slats 50x15 mm;
- fasteners (the best option is galvanized self-tapping screws);
- wooden hinges - 4 pieces.
Assembly work is carried out in the following sequence:
- To create the frame, cut the plywood into two parts, one of which is cut in half again to obtain a pair of 75x75 cm plywood squares (future side walls). The remaining plywood pieces measuring 150x75 cm will be used as back wall, ceiling and floor.
- Cut 4 strips of equal length for the side panels and 2 for the end, the length of which should be 2 cm less than the length of the walls. These are the guides for the lattice removable bottom.

- Fasten the lower planks along the edges of the walls, stepping back from the side cuts by 1 cm. Keeping 3 cm away from them, fasten one more plank in parallel. At the same time, it is extremely important to observe the distance of an improvised slide between the elements, so that subsequently the removable bottom and pallet move without difficulty.

- Attach block strips to the sidewalls as stiffeners. Their size must be calculated in such a way that from above they are on a par with the cut of the walls, and from the bottom they are 3 cm higher than the upper bar.Then you can connect the sidewalls and the rear wall using galvanized screws and metal corners. It is advisable to insert fasteners into holes prepared in advance. The grooves in the bottom of the structure must match exactly.

- Assemble the front panel frame, and attach the hinges from the inside of the sides of the resulting frame, on which you can subsequently hang the door.

- Screw the previously prepared parts for two doors to the hinges:

- Attach the bottom and ceiling, cut from the same plywood sheet:

- Prepare a removable mesh bottom. The mesh must be fixed between the plywood planks like a frame to ensure the structure is strong and practical.

- Similar to the mesh bottom, make a litter tray, but use a lightweight and hygienic plastic panel as the base. It should be borne in mind that the tray should be slightly smaller than the plywood bottom. This will allow him to walk freely but securely. Its bottom should be covered with wood shavings or covered with paper.

- Cover the space between the mesh and the bottom with a wide bar, which is nailed to the frame with self-tapping screws. It keeps the droppings from getting enough sleep and limits the spread of odor.

- Make mesh windows on the doors. To do this, using a jigsaw, you need to cut out the central part of the plywood part, and attach a strong plastic mesh to the resulting frame.

Instead of doors, you can attach a plastic wrap to the upper crossbar, which should also be fastened with nails from below. When the chicks are older, the film should be replaced with a plastic or metal mesh.
Method number 2
Initially, you need to prepare the following materials:
- a sheet of moisture-resistant plywood 1.5x1.5 cm in size and 1-2 cm thick;
- wooden bars or slats;
- metal corners;
- self-tapping screws.
The assembly instructions for the structure are as follows:
- With a saw or jigsaw, cut off a 0.5x1.5 m section of plywood from a sheet of plywood.Then it needs to be cut into three equal parts of 0.5x0.5 m each, two of which will be used as sidewalls. Cut the remainder of the sheet into three 1.0x0.5m pieces to create a ceiling, floor and bottom of the retractable dropper pan.
- Fasten the top and back walls of the future box with the sides. To facilitate the assembly process, you can initially prepare a frame of a suitable shape from wooden battens or pieces of a metal profile.
In order to prevent plywood from cracking when fixing it on self-tapping screws, small holes should be prepared in it first.
- Assemble the frame from wooden pallet strips. Its dimensions should be such that it fits easily under the brooder (approx. 97x48 cm). Next, you need to fit a piece of plywood to the dimensions of the frame and attach it with nails. It is also worth covering the pallet with oilcloth to make it easier to throw away the litter collected on it.
- On the sidewalls, fix the guide strips on which the pallet and the bottom will be held. After that, you can install the pallet.
- Make a floor frame from the slats, and then attach a metal mesh to it so that the droppings can flow into the installed pallet. If the brooder contains newborn chicks, it is worth placing newspapers or cloth on the bottom for the first few days.
- Using the slats, assemble the door frame, to which the plaster mesh is attached. Next, fasten the hinges on the sides, on which to hang the door. In addition, it is advisable to install door latches or a block of wood in the middle of the front of the frame.

The assembled structure, if desired, can be painted on top, and then placed in a suitable place and run chickens into it.
Step-by-step instructions for assembling a brooder for a home are presented in the video below:
Method number 3
The fundamental difference between this model of a homemade brooder is that it is made from ready-made materials at hand, namely:
- wooden box;
- canisters;
- piece of fabric.
Using a ready-made box or assembling a frame with a length of 120 cm according to the above instructions, you must perform the following actions:
- Divide the brooder into two segments of 70 and 50 cm respectively. Most of them will have a plexiglass or glass window, while the smaller part will remain closed and will be designed for young animals to spend the night.
- Make double walls, the distance between which should be 15 cm. They should be placed above the floor in a closed segment. Attach canister holders to them.
- Make a window frame and insert glass (plexiglass).
- Attach the frame holders to the open part of the brooder and position the frame with the hinges. This will open the window.
- Make a side door. It can be presented as a small hole or an opening front panel.
- Hang a fabric screen between the segments.
- Fill the gap between the walls in the closed part with peat, and make a double lid above the canister like walls, fill the space in which with heat-insulating material.
- Install a hot water canister and close the lid. From time to time it is necessary to change the water in the canister.

In addition to the canister, an incandescent lamp can be installed in the brooder, however, it must not be allowed to come into contact with the cloth, otherwise it may ignite.
Organization of lighting and temperature
To keep the chicks comfortable, it is necessary to equip the correct lighting and heating system by installing an infrared lamp or a conventional 60W power and an infrared heating film.
It is believed that for every square meter there should be about 0.28 kW. At the same time, the quality of the heating system can be assessed by the activity of the chicks. If the temperature is set correctly, they actively eat and drink, if it is insufficient, they gather in heaps and try to warm up, and if it is too high, they cannot breathe and die. In this case, the temperature regime must be adjusted depending on the age of the young:
Age (days) | Drawer temperature (° C) | Indoor temperature (° C) |
1-5 | 35-34 | 23-24 |
6-10 | 29-27 | 22-23 |
11-20 | 26-24 | 22-23 |
21-30 | 24-22 | 21-22 |
31-40 | 22-20 | 21-20 |
41-60 | 20-18 | — |
60 and more | 18-16 | — |
To maintain the set parameters, experienced craftsmen advise organizing a lighting-heating system using an electric lamp, a socket, a plug and a cable. Installation work is carried out in the following order:
- Drill a hole for the cable in the ceiling of the box, and then thread it inside and fix the cartridge on it. Bring the outer end of the cable to the plug.
- Install a dimmer (dimmer) and a plug on the outside of the box.
- On the back wall, provide a place for mounting a thermometer, which will allow you to monitor the temperature regime inside the box.
- Install the lamp in the socket. In order to organize areas with different degrees of heating in the structure, a lamp with a reflector should be used. This way, chicks can gather under the reflector if they freeze and move away from it in extreme heat.
For the first three days, chicks need to be provided with lighting for 23 hours a day.
Arrangement of feeders and drinkers
As feeders, ordinary galvanized scraps are well suited, which just need to be wrapped. In this case, the dishes can be filled with food outside without disturbing the young. In addition, it is filled with enough feed at a time, so no chick will go hungry.
As for drinking bowls, it is worth choosing nipple systems with drip catchers, since they are safe for chicks and, thanks to the metered feed, the species prevent the cultivation of dampness in the pan, which is very dangerous for the young. For the same reason, vacuum drinking bowls or plates should not be used. In addition, chickens may drown in them or choke during watering.
How to temporarily replace a brooder?
If the chickens are already on hand, and it takes some time to make a "house" for them, the breeder has to decide the issue of their temporary placement. To do this, you can use a box for household appliances, which only needs to be slightly modified:
- Insulate the bottom so that it is non-slip. To do this, it can be covered with 2-3 layers of gauze or a sheet of corrugated cardboard.
- Cut out a viewing window in the wall of the box, at a convenient height, and then tighten it with a transparent plastic film. This will allow you to drop in at the chicks at any time without opening the box or disturbing them.
- Create a heating-lighting system in the box. To do this, you can use a liter jar with a screw-down metal lid. On its inner surface, with the help of bolts, you need to fix a small metal cartridge and tighten the light bulb.It is advisable to install a non-combustible gasket between the lid and the cartridge, for example, textolite. To ensure air exchange inside the can, the lid should be pierced several times. Next, fill the container 1/3 with fine sand, and wrap the bottom with a cloth or put on a tight sock, otherwise the chickens may burn themselves.
If the box is large, you need to put several similar jars of sand in it.
A brooder can be bought in a store for 6,000-10,000 rubles, or you can make it yourself using ready-made drawings and available materials. After assembly, it will need to be equipped with an incandescent lamp, feeders and drinkers. If you are raising a large stock, you can build multi-tiered chick cages.